
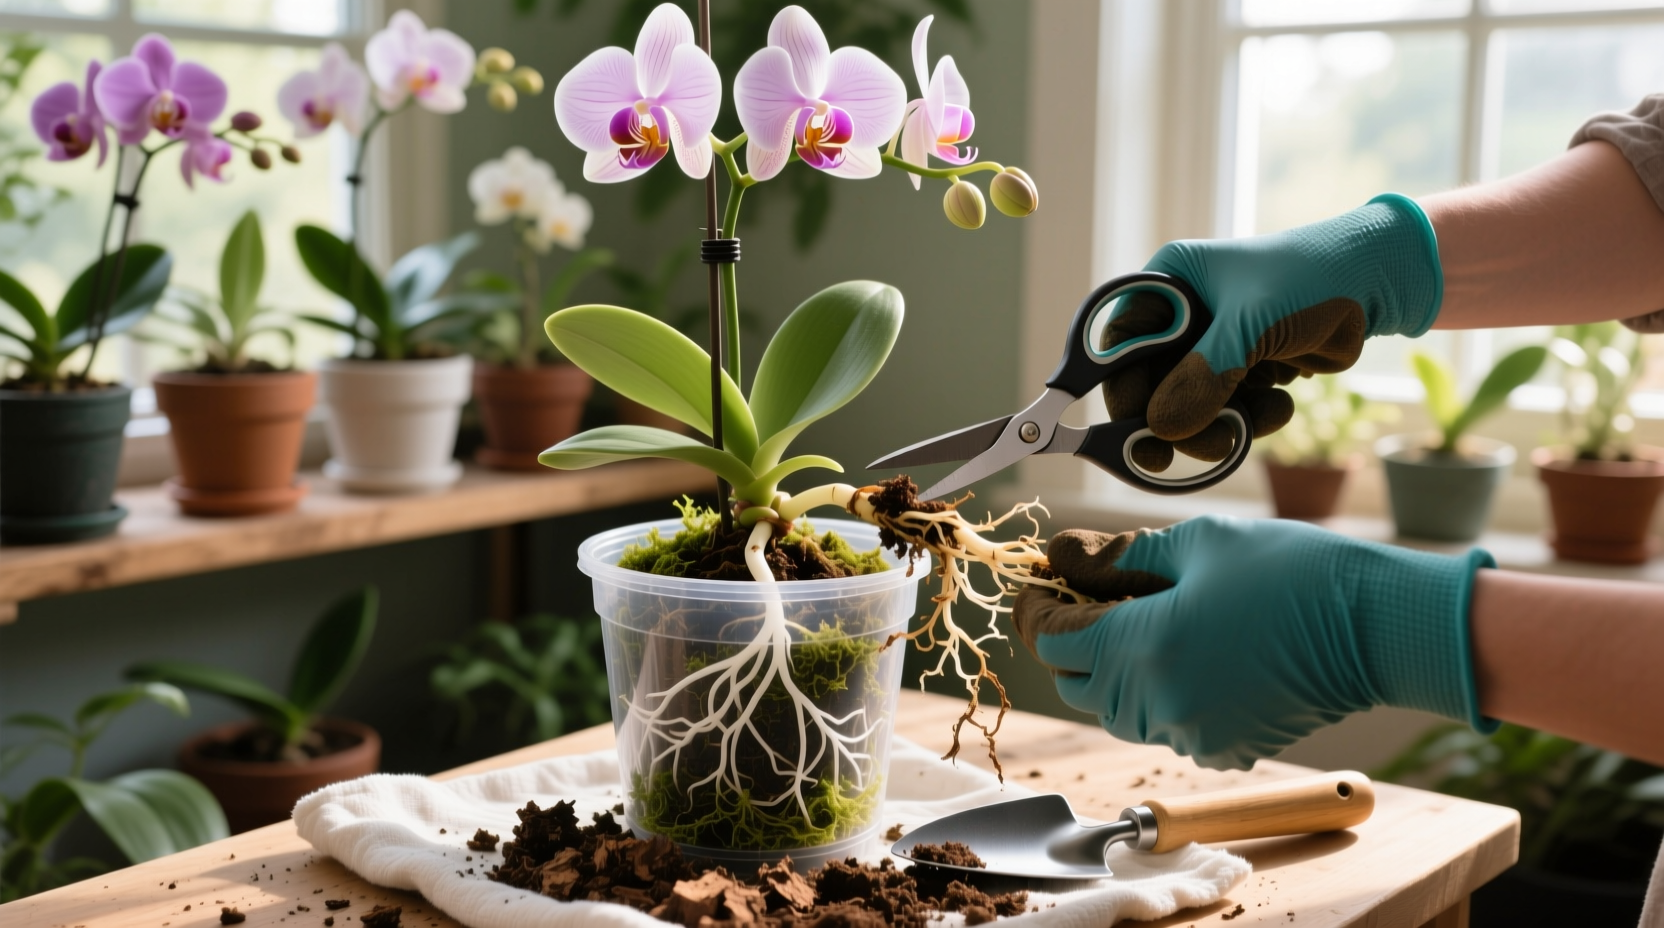
Why Repotting Orchids Is Fundamentally Different Than Other Houseplants
Orchids aren’t potted—they’re anchored. Unlike ferns, pothos, or peace lilies that thrive in moisture-retentive soil and benefit from regular root confinement, most orchids are epiphytes: they grow on trees in nature, drawing nutrients and moisture from humid air, rain, and debris accumulating around exposed roots. Their roots are covered in velamen—a spongy, silvery-white tissue that absorbs and stores water, then dries rapidly between wettings. This physiology demands high airflow, rapid drainage, and zero compaction.
Standard potting soil suffocates orchid roots within weeks. Even “orchid mix” sold in big-box stores often contains too much peat or fine coconut coir, which holds water like a sponge and breaks down into sludge. That’s why repotting isn’t about giving more space—it’s about replacing degraded medium before it triggers root rot, restoring oxygen flow, and correcting physical instability (e.g., a top-heavy plant wobbling in a pot).
This distinction explains why many well-intentioned growers kill orchids: they repot too often, use the wrong medium, or force roots into tight quarters. A healthy Phalaenopsis may stay in the same pot for two full years without stress—if its bark remains chunky, dry between waterings, and free of sour odor or mushy roots. Repotting is corrective, not cosmetic.
How to Know *Exactly* When Your Orchid Needs Repotting
Don’t rely on time alone. Watch for these five objective signs—each confirmed by direct inspection:
- Medium breakdown: Bark pieces are soft, dark brown, or crumbly; sphagnum moss is compressed, blackened at the base, or smells musty. Run fingers through the top layer—if it feels dense, slimy, or clumps like wet paper, it’s no longer functional.
- Root health decline: More than 30% of visible roots are brown, hollow, or snap easily when gently bent. Healthy roots are firm, green or silvery-white (when dry), and plump—not shriveled or translucent.
- Drainage failure: Water pools on the surface for >10 seconds or takes over 90 seconds to fully drain from the bottom holes—even after thorough watering.
- Pot instability: The plant rocks or tilts easily, or roots are growing aggressively over the pot rim *and* the base feels loose—not just because the plant is top-heavy.
- No new root growth for >6 months: Especially telling in spring/summer. If you see no white root tips emerging despite proper light and feeding, the medium may be inhibiting uptake.
Note: Yellowing leaves alone are rarely a repotting signal. They more often indicate overwatering, low light, or nutrient imbalance. Likewise, flower spike drop or bud blast doesn’t mean it’s time to repot—it usually points to temperature shock, ethylene exposure, or inconsistent humidity.
The Optimal Timing Window—By Genus and Climate
Timing hinges on your orchid’s natural growth rhythm—not yours. Here’s what works across common indoor genera:
| Genus | Best Repotting Season | Key Growth Signal | Regional Adjustment |
|---|---|---|---|
| Phalaenopsis | Early spring (March–April in Northern Hemisphere) | New white root tips ~1–2 cm long, emerging from base or along stem | In subtropical zones (USDA 10–11), extend window to May if monsoon humidity delays drying |
| Cattleya & Laelia | Late winter to early spring, just before new pseudobulb swelling | Firm, green sheath forming at base of new growth | Avoid repotting during dry, windy Santa Ana or Mistral winds—roots desiccate fast |
| Dendrobium (nobile type) | Immediately after flowering, before new cane growth begins | Flower spikes fully brown and dry; cane base shows faint green swellings | In cool-summer coastal areas (e.g., San Francisco), wait until soil temps exceed 16°C (61°F) at depth |
| Oncidium & Brassia | When new roots are 2–3 cm long and still bright green (not yet silver) | Root tips glistening, slightly sticky to touch | In high-humidity tropics, repot in drier season months to avoid fungal flare-ups |
Never repot during dormancy (e.g., Cymbidium in midwinter), while in full bloom (except emergency rot rescue), or within 30 days of major environmental change (new apartment, HVAC installation, or moving from greenhouse to balcony).
Essential Tools and Materials—What You *Actually* Need
You don’t need specialty kits—but you do need precision tools and verified materials. Skip anything labeled “orchid fertilizer” or “root stimulator” for repotting day; those belong in the feeding schedule, not the potting mix.
- Sterilized cutting tool: A single-edge razor blade or bypass pruners dipped in 70% isopropyl alcohol for 30 seconds—not bleach (corrodes metal) or hydrogen peroxide (ineffective against fungi). Replace blades after each plant if sharing pots.
- Appropriate pot: Unglazed clay (for Phalaenopsis in humid rooms) or plastic with 4+ side slits (for Oncidium in dry climates). Depth should equal width; never use deep, narrow “rose pots.” Drainage holes must cover ≥30% of the pot’s base area.
- Medium—genus-specific:
- Phalaenopsis: Medium-grade fir bark (⅜–½ inch chunks) + 10% perlite. Avoid moss unless you’re an experienced hand-waterer in arid zones.
- Cattleya: Coarse bark (½–¾ inch) + charcoal chips (1:10 ratio) to buffer pH and absorb toxins.
- Dendrobium nobile: Fir bark mixed 1:1 with lava rock (¼ inch) for weight and stability.
- Oncidium: Small bark (¼ inch) + dried New Zealand sphagnum (not Canadian—too dense).
- Clean workspace: A tray lined with newspaper and a small bowl of clean water for rinsing roots. No towels—they trap debris and lint.
A Step-by-Step Repotting Protocol—No Guesswork
Follow this sequence precisely. Deviations increase transplant shock and rot risk.
- Water lightly 2 days prior. Not to saturate—just enough to make roots supple. Dry roots snap; soggy roots tear.
- Gently remove the plant. Tip pot sideways, support the base, and ease out. If stuck, run a dull knife around the inner rim—not down the sides where roots cling.
- Rinse roots under lukewarm running water. Use a spray nozzle on “shower” setting. Remove all old medium—no exceptions. Gently tease apart matted roots with fingers, never force.
- Inspect and prune. With sterilized tool, cut away:
- All brown, black, or hollow roots (cut back to firm, white-green tissue)
- Any root with soft, wet decay (even if only at tip)
- Broken or frayed ends (clean cut promotes healing)
- Let roots air-dry 30–60 minutes. Place on clean paper towel in indirect light. Roots should feel leathery, not damp. This prevents immediate rot upon rehydration.
- Position in new pot. Place largest root cluster near the pot’s center. Rest the oldest pseudobulb or stem base against the inner wall—not centered—so new growth has room to expand outward.
- Add medium gradually. Spoon bark around roots, tapping pot gently on table to settle. Never pack or compress. Fill only to the base of the lowest leaf or pseudobulb—never cover the crown. For Phalaenopsis, the junction of leaves and roots must sit level with or slightly above the medium surface.
- Stake if needed. Use a bamboo skewer inserted into medium (not root zone) and loosely tie only unstable canes—not flower spikes.
- Wait to water. Hold off for 7–10 days. Then water deeply once—until water runs freely from drainage holes. Resume normal schedule only after new root tips appear (usually in 2–3 weeks).
Five Critical Mistakes That Cause Orchid Decline After Repotting
These errors account for over 80% of post-repotting failures in home collections:
- Mistake #1: Repotting into a larger pot “for future growth.” Orchids dislike excess space. A pot 1–2 inches wider than the root mass is ideal. Oversized pots hold moisture too long, starving roots of oxygen.
- Mistake #2: Using unsterilized tools or reusing old medium. Fungal spores (like Fusarium or Pythium) live in spent bark and on dirty blades. One contaminated cut spreads rot systemically.
- Mistake #3: Burying the crown or rhizome. The growing point—the crown—must remain exposed. Covering it invites crown rot, especially in Phalaenopsis and Paphiopedilum. For sympodial orchids (Cattleya, Dendrobium), the rhizome should sit flush with the medium surface—not buried.
- Mistake #4: Watering immediately after repotting. Fresh cuts need time to suberize (form protective cork). Watering too soon floods wounds, inviting pathogens. Patience here doubles survival odds.
- Mistake #5: Ignoring post-repotting light and humidity shifts. Move the plant to slightly lower light (e.g., east instead of south window) for 10–14 days. Keep humidity at 50–60%—not higher—to discourage fungal colonization on open wounds.
Species-Specific Nuances You Can’t Overlook
One-size-fits-all advice fails with orchids. Consider these non-negotiable adjustments:
Phalaenopsis: Never let the medium dry completely before repotting—roots desiccate fast. Use plastic pots with slits, not clay, unless ambient humidity stays above 60% year-round. If aerial roots are abundant, leave them exposed; don’t force them into the pot.
Paphiopedilum: These terrestrial cousins need finer, moisture-retentive mixes—50% fine bark + 30% perlite + 20% chopped sphagnum. Repot in late winter, right after bloom, when new growth emerges. Their crowns are especially prone to rot—keep medium ½ inch below the leaf base.
Vanda: Not potted at all. Mount on cork or tree fern slab, or grow bare-root in slatted baskets. Repotting means remounting—trim dead roots, wire securely, and hang in high-light, high-airflow location. Never use any medium that retains water.
Brassavola & Angraecum: Prefer very coarse, fast-draining mixes (70% large bark + 30% lava rock). Their thick, fleshy roots tolerate drying but despise stagnation. Repot only when bark disintegrates—not on schedule.
What to Expect in the First 30 Days—and When to Worry
Normal post-repotting responses include:
- One or two older leaves yellowing and dropping (especially in Phalaenopsis)—this is metabolic reallocation, not distress.
- No new flowers for 4–6 months—energy goes to root regeneration first.
- Minimal top growth for 3–4 weeks while roots establish.
Red flags requiring action:
- New leaves turning yellow from the tip inward → overwatering or crown rot. Unpot immediately, inspect crown, treat with cinnamon or sulfur dust, and remount on dry bark.
- Roots turning brown within 10 days → medium too dense or pot too large. Switch to coarser mix and smaller pot.
- No new root tips after 25 days → check light intensity (needs 1,000–1,500 foot-candles at leaf level) and ensure nighttime temps dip 5–7°C (10°F) below daytime for at least 3 weeks.
FAQ: Practical Questions From Real Orchid Growers
Can I reuse orchid bark from last year’s pot?
No—unless it’s been fully sterilized (baked at 200°F for 30 minutes) and inspected for decomposition. Even then, discard any piece smaller than ¼ inch. Reused bark harbors salts, pathogens, and degraded structure. It’s cheaper and safer to buy fresh, reputable bark annually.
My orchid has 10 aerial roots—do I need to bury them?
No. Aerial roots are adapted to absorb humidity directly. Forcing them into medium causes rot. If they’re green and plump, mist them lightly 1–2x/week. If shriveled, increase ambient humidity—not pot moisture.
Should I fertilize right after repotting?
No. Wait until you see 1–2 cm of new root growth (usually 3–4 weeks). Then resume feeding at ¼ strength, weekly. Never apply fertilizer to dry roots or during the first month—it burns tender new tissue.
What if I accidentally broke a healthy root during repotting?
Trim the broken end cleanly with sterilized tool and dust with ground cinnamon (natural antifungal). Monitor closely for browning at the cut site over 7 days. If stable, continue care normally. Most orchids regenerate roots quickly if overall health is strong.
Is it okay to repot multiple orchids at once?
Only if you sterilize tools between each plant and use separate trays, water bowls, and gloves. Cross-contamination spreads bacterial brown spot (Acidovorax) and black rot (Phytophthora) faster than you can say “epiphyte.” Treat each orchid as a biosecure unit.
Final Thought: Repotting Is Root Care—Not Pot Decoration
Every successful repot starts with humility: observing what the plant communicates, not imposing our timelines or aesthetics. An orchid doesn’t need “fresh dirt”—it needs functional architecture for gas exchange, precise hydration, and unhindered root expansion. When you prioritize root health over bloom frequency, pot size, or visual symmetry, your orchids reward you with resilience, longevity, and eventually, generous flowering—not as a demand, but as a quiet, seasonal affirmation of trust well placed.
Remember: the best repotting job is the one you didn’t rush, didn’t assume, and didn’t skip the sterilization step. Keep notes—date, genus, medium used, root condition, and weather conditions. Over time, your personal log becomes more valuable than any generic guide. Because orchids don’t follow manuals. They follow biology—and your role is to listen closely, act deliberately, and protect their roots like the irreplaceable lifelines they are.
With consistent attention to timing, medium integrity, and sterile technique, repotting transforms from a source of anxiety into a ritual of stewardship—one that deepens your understanding of how life thrives not in stillness, but in the dynamic balance of air, water, and renewal.
Now go check your Phalaenopsis’ root tips. If they’re white, plump, and pushing forward—spring is calling. Answer wisely.




 浙公网安备
33010002000092号
 浙B2-20120091-4